Creating a TTN Mapper GPS node with the Things Uno

Recently I went on a DofE expedition in the Brecon Beacons. I wanted to try mapping any LoRaWAN coverage while I was there using TTN Mapper, but we weren’t allowed our phones so I couldn’t use the app.

However, TTN Mapper also allows you to use nodes that broadcast their GPS coordinates, thus removing the need for a phone, so I decided to try combining the school’s Things Uno from the DVLA competition and a NEO-6M GPS module which I wasn’t currently using. The data is forwarded to TTN Mapper via an integration in the TTN console.

I did most of the work on the node the day before the expedition because I’d been revising for my end of year exams, yet somehow managed to get it working in time. It ended up as a plastic box containing the Things Uno and the NEO-6M along with a USB battery pack:

The Things Uno and the NEO-6M in the box

The code I wrote can be found here. I used the TinyGPS++ library and SoftwareSerial to interface with the NEO-6M. I got stuck for quite a while because it turns out that the Arduino Leonardo (which the Things Uno is based on, despite its name) can only use SoftwareSerial on certain pins, and I was trying to use pins 2 and 3 which didn’t work. Lesson learned!

I also had time to try and reduce the power consumption. I used the LowPower library to put the Arduino into idle mode, turned off the built in LoRa radio module and also sent commands to turn off the NEO-6M between transmissions. I checked with a multimeter and the NEO-6M still consumed around 11mA when turned off, which is a lot but still better than the ~50mA it used when turned on.

Unfortunately there wasn’t any coverage in the area we were walking – I wasn’t really expecting anything since the nearest gateway was 15km away on the other side of a mountain. However, I still had fun making the node and learned some GPS concepts such as HDOP which will be useful for my computer science NEA.

Using object oriented programming in C++ to create an ESP8266 breakout game

Recently I’ve been making a breakout game for an ESP8266 module that has a 64×128 OLED display and a 4-way joystick:

Up until now I’ve avoided using any object oriented programming with Arduino. However, I wanted to have a go at it, and this seemed like a good project to start.

You can see the code here: https://github.com/brychanthomas/ESP8266-OLED-breakout

I ended up with the following classes:

  • Sprite – an abstract class to represent a sprite that can be drawn on the OLED screen
  • Paddle – represents the movable paddle at the bottom of the screen, inherits from Sprite
  • Ball – a class to represent the ball that bounces off things and destroys bricks, also inherits from Sprite
  • Brick – represents a single brick, inherits from Sprite
  • Bricks – contains and manages all of the bricks in the game
  • BreakoutGame – the overall game, creates Paddle, Ball and Bricks instances and calls their update and draw methods each frame

Here’s a UML class diagram:

Initially a “push to play” message is displayed. When the button is pushed the game starts. The paddle is moved left and right using the joystick. If the ball hits the bottom of the screen, the game pauses and a “push to play” message appears. When the user pushes the button the game resumes, with the ball moved upwards. Once all of the bricks have been destroyed, a “winner!” message is displayed for five seconds before the game resets to the “push to play” message, and can be played again.

Here is a (poor quality) GIF showing some gameplay:

The part I found most difficult was the collision detection between the ball and the bricks. The display is supposed to be used horizontally, not vertically like I was using it, so the x axis went downwards from the top, and the y axis went from right to left. It took me a while to get my head around it because I’m so used to y going upwards or downwards and x going from left to right.

To detect collisions the program finds the point on the edge of the brick closest to the ball. If the distance between this point and the centre of the ball is less than the radius, the two sprites are overlapping and the ball should bounce and the brick be destroyed. This page helped me a lot.

Another problem I had is that, because the display was rotated, using the text rendering functions of the OLED library showed the text sideways, and there isn’t a way of rotating it. As a result, I had to use XBM images instead. I created the “push to play” and “winner!” messages in MS Paint, saved them as BMP files and converted them to XBM using an online converter. I could then display them in the program with the correct orientation.

I’ve enjoyed my first foray into OOP with C++ and I feel more confident that I can use it on future Arduino projects.

Experimenting with programming an Arduino using AVR assembly

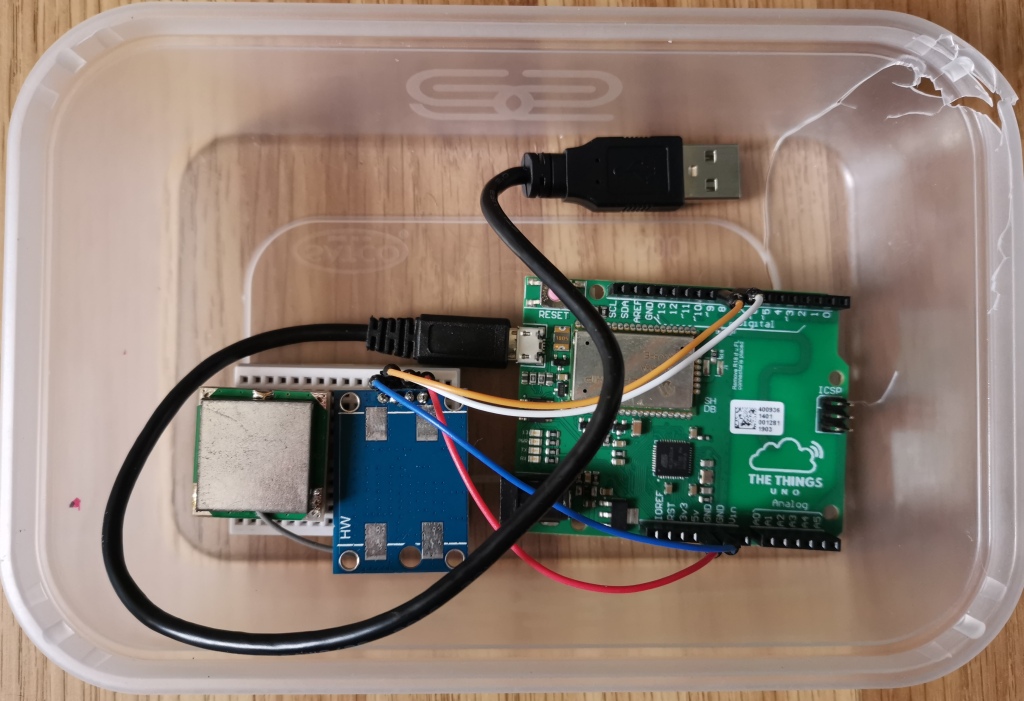
Recently we have been taught the imaginary assembly language used by AQA as part of A level computer science in school. I found these lessons very interesting, and I wanted to try using a real assembly language.

I decided to try the AVR assembly language used by Atmel chips (such as those found in Arduinos) because it is much simpler than, for example, the x86 language used by Intel and AMD processors. The chips are 8-bit microcontrollers, meaning that there aren’t a massive number of instructions. (an interesting fact I learned recently is that the modern manual for the Intel x86 language has more pages than the 6502 processor found in the Commodore 64, BBC Micro, NES, and Apple II had transistors!)

The programs are all in a GitHub repository here.

First program – serial output

The first program I created just outputs a string via the serial connection to the PC over and over again. I relied strongly on this GitHub repository to figure out how to use the serial interface.

Second program – Fibonacci

Now that I had the serial output working, I decided to try and make a program to output the Fibonacci sequence. I used 16 bits to represent the terms, a combination of two 8 bit registers.

Also, I output the terms in hexadecimal because it’s much easier to convert an integer to a hexadecimal string than to a denary string, since each character is exactly four bits. I can perform a bitwise AND with 0b00001111 to get the lower nibble and 0b11110000 to get the upper nibble. For the upper nibble I have to do a swap instruction to get the top four bits to the lower nibble (originally I did four right shifts before I discovered the swap instruction). Finally I just add 48, the ASCII character code of 0, and voila, hexadecimal.

Here is the output of the program. As you can see, it only gets to 0xB520 because the next number needs more than 16 bits and it is set to halt when it overflows.

Third program – string reverser

For the third program I wanted to use the stack beyond just calling subroutines.

I created a program that takes an input string over serial, pushes each character to the stack one by one until it encounters a newline, then pops and prints each character one by one.

Here it is in action. I made it print ‘>’ as a prompt to try and make it clear which lines are user input and which lines are output.

Fourth program – multiplier

For the next program I wanted to try accepting user input and giving output in denary instead of hexadecimal. I created a program that takes two positive integers separated by an asterisk (and optional spaces which are ignored) and outputs the result of multiplying them together.

The two inputs are stored using 8 bits each, so the maximum is 255, while the result is stored using 16 bits, allowing numbers up to 65535 to be calculated.

Converting the ASCII user input into an integer wasn’t too difficult – as the characters are entered, they are pushed to the stack (except space). When an asterisk (for the first number) or a newline (for the second number) is encountered, a subroutine is called to process the number. For each character from right to left (because they’re popped from the stack in reverse), it subtracts 48 (the ASCII code of the character zero), multiplies by a power of 10, and adds the result to the sum. The digit multiplier is multiplied by 10 on each number (1, 10, 100). For example, the string ‘123’ would be calculated using (3 * 1) + (2 * 10) + (1 * 100).

By far the hardest part was converting an integer result back to a denary string. I divided the integer by successive powers of 10 (10000, 1000, 100, 10, 1), each time using the remainder of the previous calculation. This gave me the value of each digit, which I could then add 48 to to get the correct ASCII characters which were then printed. The issue was that Atmel AVR chips don’t have a divide instruction, so I had to implement division in software. However, to implement division I had to multiply 16 bit numbers, which added more complexity because the chips can only multiply 8 bit numbers. However, I got it working in the end.

As you can see in the image below, if either of the inputs are above 255 they overflow.

I’ve enjoyed figuring out how to do these basic things with assembly language and it’s given me an insight into how computers work at a low level. It’s also made me appreciate how useful high level languages are!

The Things Certification

In this year’s Things Conference, the ‘Things Certification‘ was launched. It is designed to test your knowledge around the LoRaWAN specification, configuration and implementation. Currently there are four certificates available, and you have to do a 30-minute multiple choice test for each.

Usually they cost €99 each, but they are free until the first of March. Not wanting to miss out I ended up doing all four of them. I had to read up on the LoRaWAN protocol by looking at the 1.0.3 and 1.1 specifications, reading the Things Network documentation, watching some of the Semtech LoRaWAN Academy videos and researching on the Internet. I made a word document with notes for each certification to help me remember the information and which I could refer back to.

The pass mark for each test was 70%. I ended up managing to obtain all of them with the following scores:

  • Fundamentals – 96%
  • Security – 92%
  • Network Management – 76%
  • Advanced – 86.7%

I’m very happy with these scores, especially since I had less than a month to do all four. By doing this certification I’ve also enjoyed learning a lot about different aspects of LoRaWAN and radio communication.

Matrix Challenge Final

On Saturday I took part in the virtual grand final of the Matrix challenge, a UK-wide competition run by the Yorkshire and Humber Regional Cyber Crime Unit for 11-17 year olds.

The competition consisted of a series of capture-the-flag style challenges. Each was a cybersecurity-related puzzle ranging from cracking hashes using rainbow tables to figuring out PINs from obscure clues. Completing each challenge gave you a number of points based on its difficulty level. Bonus points were also given to the first person to complete a challenge in their region.

I ended up coming second in the Tarian region consisting of South and Mid Wales and twenty-first in the UK, which I am happy with.

I enjoyed the challenges and hope to take part in the competition again next year.

CST Virtual Hackathon

This week I participated in the Cardiff School of Technologies’ virtual hackathon.

We were given two modules on the EC Council’s Learn on Demand platform to complete in the shortest time possible, ‘Hacking Wireless Networks’ and ‘Hacking Mobile Platforms’. The modules involved following a series of instructions over remote access to several virtual machines from the browser.

I didn’t get a very good score, with the first module taking me 26 minutes and the second taking 78 minutes. However, I enjoyed having an opportunity to use penetration testing tools and learning about different exploits.

Creating a simulator for Malkus waterwheels with Java

Over the weekend I used Java to create a simulator to demonstrate Malkus waterwheels, which is something I found out about while reading about chaos theory on Wikipedia.

The Malkus waterwheel is a special type of waterwheel that exhibits chaotic behaviour. This means that a small change in initial conditions can lead to very different motion in the wheel over time.

The waterwheel has several buckets that each have holes at the bottom for water to flow back out. The bucket at the top is filled by a tap.

I decided to use Java because I am learning it as my Duke of Edinburgh skills section and wanted to do a project to get some practice. The window is created by the Swing package but the AWT package is used to update the graphics every frame within a Swing JPanel.

Before I could do the project I had to research angular acceleration and polar coordinates. It is easier to represent the positions of the buckets using polar coordinates than Cartesian coordinates because the velocity and acceleration are calculated in radians/second. I convert the positions to Cartesian coordinates when I draw the buckets to the screen.

I came up with the following process for simulating the motion of the wheel:

  1. For each bucket, find the component of its weight acting perpendicular to the radius of the wheel. The parallel component can be ignored because it is balanced by the centripetal force.
  2. Add up all of the forces (weight components) acting perpendicular to the radius. Add a drag force acting in the opposite direction to the wheel’s angular velocity (proportional to the magnitude of the velocity) to find the resultant force causing the wheel to rotate.
  3. Calculate the angular acceleration \alpha of the wheel in radians/second using
    \alpha = \frac{F}{mr}
    where m is the mass of the wheel and the buckets with the water and r is the radius of the wheel.
  4. Each frame increase the wheel’s velocity by the acceleration divided by the frame rate (because the acceleration is the change in velocity every second, not every frame).

I placed two wheels side by side and gave them starting angles of 1.0° and 1.2° away from horizontal. Although the wheels start off about the same, they quickly diverge and start moving differently, even though the initial difference was only a fifth of a degree.

Here is a video of the program in action:

As you can see I added in graphs to show the centres of mass of the two wheels underneath. I also put in graphs of the velocity against the x an y coordinates of the centre of mass of the left wheel. These plot the distinctive shape of a Lorenz attractor (although the bottom one is upside down because the top of the y axis is 0 here when it’s usually the other way round). This proves that the waterwheel does follow the Lorenz equations, even though it is being modelled using Physics here instead.

Every frame the program writes the angular velocity and centre of mass data to a CSV file, which means I can plot graphs using Excel:

JavaScript crafting game

During the lockdown I created a game with my friend Ronan. He made the graphics and I programmed it using the Phaser game engine.

In the game you are a space man whose spaceship has crashed into our school. The objective is to look around the school to find items and combine them together until you have a radio transmitter you can use to call for help.

I created different classes to manage different parts of the game. For example, some of the classes are InventorySlot, CraftingSlot, Inventory, DroppedItem, DroppedItemHandler, FloorManager, Barriers, Player and so on.

To help me remember everything I did I used JSDoc to generate documentation from specially formatted comments in the code:

It’s the first time I’ve used JSDoc and I’m pretty pleased with the results.

The backgrounds were just flat PNG files, and I needed a way to add barriers to prevent the player from passing through obstacles such as walls and furniture. To do this I used p5.js to create a tool to let me indicate where there are barriers that the player can’t cross:

You can add polygons with a certain number of vertices by pressing the number keys and then drag the vertices around to cover the area the player shouldn’t be able to enter. It then exports the barriers as an array of shapes with vertices at certain coordinates that can simply be copied and pasted into the code of the game. An instance of the Barriers class then processes the list to add the shapes to the game’s physics so that the player can collide with them.

Here is a demonstration that you can move around, pick up items, open the inventory window and craft new items using the special crafting slot:

You can also move between different floors of the school using the stairs:

I am very pleased with the game we have created and it’s given me an opportunity to practice using JavaScript with Phaser and to learn about JSDoc.

Designing and building an air quality monitor

Around a year ago the headmistress of the school asked if it would be possible to build a device capable of monitoring the air quality around the school in real time. The computer science teacher directed her to me and I was asked to do some research and put together a shopping list of the parts that would be needed.

I decided to use LoRa and the Things Network for communication because the school already had a receiver we had bought using some of the money from the DVLA coding competition. Additionally, LoRa is a low power protocol and I already had some experience using it.

It also made sense for the monitor to be solar powered so that it wouldn’t have to be connected to the mains and would have a smaller carbon footprint.

My final design for the system was an Arduino Pro Mini with an RFM95 LoRa chip for communication and a solar panel with a charger and an 18650 Li-ion battery for power. It had three sensors: the CCS811 for measuring total volatile organic compounds and estimated CO2, the PMS5003 for measuring particulate matter and the grove multichannel gas sensor for measuring nitrogen dioxide and carbon monoxide:

A Fritzing schematic I created while documenting the system

It took a while for the parts to arrive and another while for me to build the system. The most problematic part was the solar power – I struggled to find resources on how to calibrate and use the CN3791 Li-ion charger I was using. You had to unsolder an SMD resistor in a voltage divider to calibrate it, and as I had no SMD resistors I had to solder the PCB to a matrix board and use through-hole resistors instead. While testing it I accidentally short circuited and broke the Li-ion battery on a metal table edge and it had to be replaced with a new one.

I created the enclosure using 2D design and the DT teacher laser cut it. The two sides are triangular, with the hypotenuse at the optimum angle for the solar panel to generate power in the winter. In the centre is a watertight box where all of the electronics are housed. We only just managed to get it printed, glued and sealed before the lockdown started.

The data recorded by the system is stored on a Raspberry Pi server running an Nginx reverse proxy to handle HTTPS along with a Node-RED dashboard and a Node.js API. A SQLite database is currently used, but I might upgrade to MariaDB or MySQL in the future. I also want to transition from a Raspberry Pi to a virtual Debian machine on the school’s servers.

I finished the system and it was put up on a wall overlooking the school car park in June:

The cable you can see at the bottom is the power cable going from the solar panel to the circuitry inside.

It took me until now to finish documenting the system because I couldn’t access the enclosure design files which were on the school computers.

The server has a FreeDNS subdomain and self-signed HTTPS certificates, so the only running cost of the system is the electricity for the server. The dashboard shows you live data which is transmitted every 15 minutes as well as a calculated air quality index score:

Live data
Calculated air quality index

I’ve also created a comparison dashboard with Chart.js that uses the API to let you compare averages from two time periods. For example, here is a comparison of the particulate matter levels on weekends in September and October (taken in multiple screenshots because the page is quite long):

Additionally, I made a GitHub repository for Jupyter notebooks analysing the data.

I’ve learned about a lot by doing this project, such as:

  • Different air pollutants
  • Designing parts for laser cutting
  • Reducing the power consumption of Arduino projects
  • MPPT, solar charging and lithium-ion batteries
  • Documenting APIs using Swagger
  • Using Nginx and Node-RED
  • Firewalls
  • Linux services

If I did it again I would design a PCB to connect all of the components together instead of using wires and matrix boards to make it more compact and organised.

From Nand to Tetris: Build a Modern Computer from First Principles online course

Yesterday I completed part 1 of the “Nand to Tetris” course by Shimon Schocken and Noam Nisan on Coursera. I finished all the videos and the first 5 projects during lockdown but I delayed the final project because I wanted to try and learn the basics of Java to have another language to play with.

It is a six week course that starts by looking at logic gates, then moves on to using these to build an ALU, followed by memory and a basic CPU. Each week there is a project where you use a hardware description language to create chips that can then be used in a hardware simulator. The CPU and memory chips are combined in the final HDL script you write to form a full computer using the Harvard architecture.

Alongside this you learn about the machine language of the computer and its assembly language. The final project was to create an assembler for the computer using a high level language of your choice. I chose to try and use Java. It was very cool to assemble the supplied machine code for the game Pong and to then be able to run it on an emulator of the CPU I had earlier created using the specifications supplied on the course and the hardware description language.

I really enjoyed the course and look forward to at some point completing part 2, which is another six weeks focusing on software, including a rudimentary OS and a compiler for a higher-level language.

Design a site like this with WordPress.com
Get started